If you are an orthodontic patient, it is essential to know how to use dental floss correctly. Dental floss is necessary for keeping your teeth and braces clean, and it can help prevent gum disease and other oral health problems. This guide will teach you how to use dental floss for braces effectively and efficiently. We will also provide some tips on choosing the right type of dental floss. You can also go to Leichhardt Marketplace’s dental clinic if you need to consult a professional.
How to Floss with Braces: Methods, Tips and More
There are a few different methods you can use to floss with braces. The most important thing is to be gentle and take your time. You do not want to damage your braces or injure your gums.
One popular method is the “loop” method. You will need a piece of dental floss about 18 inches long to do this. Make a loop in the middle of the floss and hold it with your thumbs and index fingers. Slide the floss under your wire and then up into the space between your gum and tooth. Use a gentle back-and-forth motion to clean the tooth surface and remove food particles. When you are finished, move on to the next tooth.
Another standard method is called the “wrap-around” method. This method is similar to the loop method, but you will wrap the floss around your index finger instead of making a loop. This can be helpful if you have difficulty holding the floss in place with the loop method.
Once you have chosen a flossing method, there are a few tips to keep in mind for flossing your entire mouth:
– Use about 18 inches of dental floss for each session.
– Be gentle when cleaning around your braces and wires.
– Floss every day, preferably after every meal or snack.
– If you have trouble reaching certain areas, try using an interdental brush or water flosser.
Types of Dental Floss for Braces
There are many different types of dental floss available, and it is essential to choose the right type for your braces. You can use any traditional floss if you have metal braces, including waxed or unwaxed floss. If you have ceramic or clear plastic braces, it is best to use softer types of flosses, such as silk or nylon. You should avoid using flavoured floss, as the flavour can cause gum irritation.
Talk to your dentist if you have trouble finding the correct dental floss for your braces. They will be able to recommend a product that is right for you.
Tell me the best Flossing Tool for Braces?
While many different flossing tools are available, we recommend the Oral-B® Floss Action Brush. This brush has a small, round head designed to clean around braces and other dental appliances. The bristles are soft and gentle, so they will not damage your braces or irritate your gums.
To learn more about the Oral-B® Floss Action Brush, visit our website or talk to your orthodontist or dentist.
We hope this guide has helped teach you how to use dental floss for braces. Remember to be gentle and take your time when flossing; floss regularly and choose the right type of floss for your braces.
How to Floss With Braces Using a Floss Threader
If you have braces, you know that flossing can be more challenging than without them. The good news is that there are a few different ways to floss with braces, and one of the most popular methods is using floss threaders.
A floss threader is a small, flexible wire piece with a loop at one end. The other end of the wire is threaded through the loop to form a “needle.” You can use this needle to thread dental floss under your braces and into the spaces between your teeth.
To use a floss threader:
Start by tying a knot at the end of a piece of dental floss.
Insert the needle into the loop and pull it through until the floss is tight against the hand.
Insert the needle under your braces and into the space between your teeth.
Gently move the floss up and down to clean the tooth surface.
When you are finished, remove the floss from your mouth and repeat the process on your other teeth.
Flossing is an essential part of oral hygiene, and it is vital for people who have braces. When you have braces, it is easy for food and plaque to get trapped in the brackets and wires. If these substances are not removed, they can lead to tooth decay, gum disease, and bad breath.
Flossing with braces can be challenging, but it is crucial to do it correctly. The good news is that there are a few different ways to floss with braces, and your orthodontist or dentist can help you find the best method for you.
Remember to floss every day, preferably after every meal or snack, to keep your gums and teeth healthy. If you have trouble reaching certain areas, try using an interdental brush or water flosser.
How to Floss With Braces Using a Waterpik or Water Flosser
If you have braces, you know that flossing can be more challenging than without them. The good news is that there are a few different ways to clean braces with floss, and one of the most popular methods is using a water flosser.
Water flossers are devices that shoot a stream of water at your teeth to remove plaque and food debris. They are very effective at cleaning around braces and other dental appliances.
To use a water flosser:
Start filling the reservoir with water and selecting the correct tip for your needs.
Position the end of the device against your teeth and gum line and turn it on.
Gently move the tip back and forth to clean your teeth.
Can I use regular floss for braces?
You can use regular floss for braces, but it may be more challenging to maneuver the floss around your brackets and wires. If you have trouble using regular floss, try one of the other methods described above.
Flossing is an essential part of oral hygiene, and it is especially important for people who have braces. When you have braces, it is easy for food and plaque to get trapped in the brackets and wires. If these substances are not removed, they can lead to cavities, gum disease, and bad breath.
Remember to floss correctly, preferably after every meal or snack. If you have trouble reaching certain areas, try using an interdental brush or water flosser.
How do you use dental floss picks with braces?
Dental floss picks are small, plastic devices with a piece of dental floss attached. They are easy to use and can be an excellent option for people who have trouble maneuvering regular dental floss around their braces.
To use a dental floss pick:
Start by holding the pick in one hand and the handle in the other.
Gently insert the choice between your teeth and move it up and down to clean the tooth surface.
When you are finished, remove the pick from your mouth and repeat the process on your other teeth.
If you have trouble using a dental floss pick, talk to your dentist. They will be able to show you how to use it properly.
How to Floss With Braces Using Super floss?
Super floss is a type of floss specially designed for people who have braces. It has a stiff end that helps you thread the floss under your archwires and a fluffy middle section that cleans around your brackets.
To use Oral b Super floss:
Start by holding the floss in one hand and the handle in the other.
Gently insert the floss under your archwire and pull it to the other side.
Use the fluffy middle section to clean around your brackets.
When you are finished, remove the floss from your mouth and repeat the process on your other teeth.
How to Floss With Braces Using a Platypus Orthodontic Flosser
The Platypus Orthodontic Flosser is a device that consists of a minor, handheld handle and a piece of dental floss. It is designed to make flossing with braces more manageable and more effective.
To use the Platypus Orthodontic Flosser:
Start by holding the handle in one hand and the floss in the other.
Gently insert the floss between your teeth and move it up and down to clean the tooth surface.
When you are finished, remove the floss from your mouth and repeat the process on your other teeth.
There are many ways for cleaning your Invisalign aligners, one of which is using the Invisalign® Cleaning System. It is one of the most chosen cleaning regimens that offer a deep-cleaning technology for an invisibly fresh set of aligner and retainer.
Taking Care of Your Invisalign
Invisalign is today’s orthodontic treatment of choice for straightening and realigning your teeth. Besides providing comfortable and convenient dental support, Invisalign offers an alternative to traditional braces for a nearly invisible and unnoticeable treatment. To provide you with an optimal experience, you must keep your Invisalign as hygienic, odor-free, and clear as possible.
While we can achieve multiple benefits in using Invisalign, not taking care of them will result in its opposite effects. Several concerns such as discolorations, bacteria build-up, and unpleasant odor which might affect your overall dental health can happen. To avoid dealing with these issues, check out the do’s and don’ts as well as the following best practices in caring for your clear aligners.
What Is An Invisalign Cleaning System?
An Invisalign® cleaning system consists of a set of specially-developed crystals that help you maintain your clear aligners’ quality. Its formulation offers a thorough and deep cleansing that works in between crevices to kill any bacteria present instantly. It also prevents the development of plaque and other unnecessary growth.
How Do I Use An Invisalign Cleaning System?
Sanitizing your clear aligners involves the use of the following materials:
Invisalign Cleaning System (Crystals)
Small Cleansing Cup
Clean Toothbrush with Soft Bristles
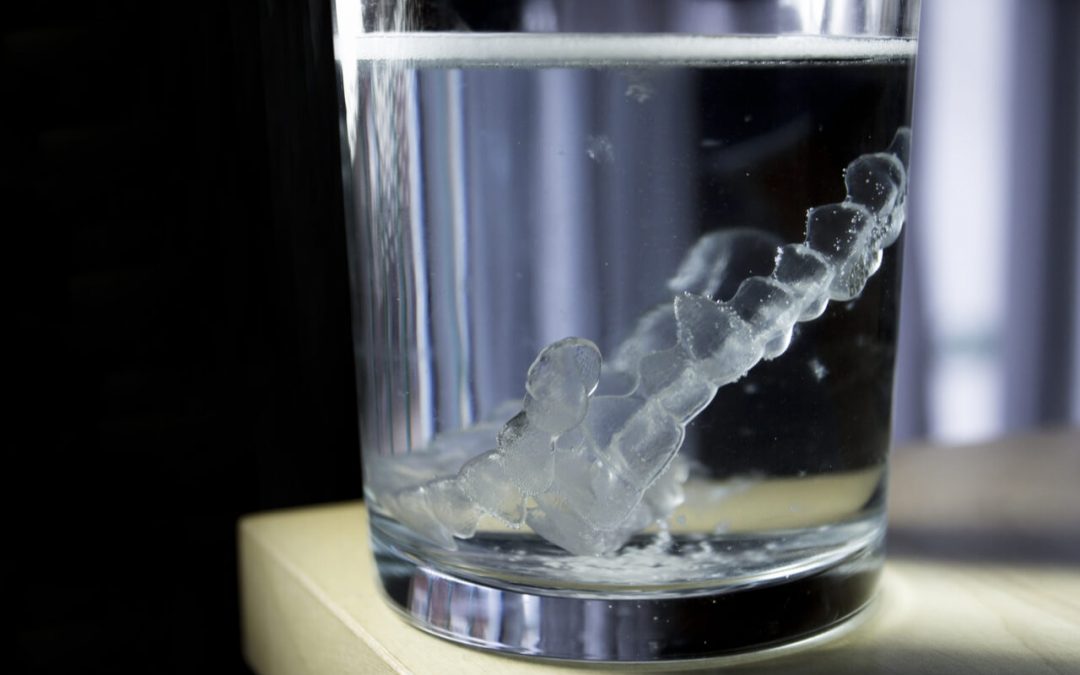
Cleaning your Invisalign involves two processes, rinsing and cleansing. To start the procedure, you must first rinse any leftover food or debris on your clear aligners using a toothbrush and warm water. It is best to submerge the clear aligners in water using a small cleansing cup to eliminate all possible traces and residues.
Making sure that all debris is gone from the surface, it is time to make use of the Invisalign cleaning crystals. These crystals dissolve in liquid to create a cleansing solution. In a separate cup of water, carefully place these crystals so that it completely disintegrates. Be mindful in stirring the solution well enough before putting the clear aligners. Soak the clear aligners in place for about fifteen minutes.
Once done, take out your clear aligners and rinse with warm water. Using a slightly saturated and soft-bristled toothbrush, gently scrub along the edges and crevices. Ensure that all stuck debris are eliminated, and give the clear aligners a final rinse before placing it in its case to dry.
How Often Should I Clean My Invisalign?
You should use your Invisalign cleaning system as often as possible. Experts also recommend cleaning your aligners regularly every time you take them off. Nonetheless, cleansing them twice a day is enough to keep away the bacteria and prevent the germ build-up.
Do clean your teeth and your Invisalign trays every morning and night
During your sleep, bacteria and germs may begin to build-up on your teeth and the Invisalign trays. Keeping this routine is essential to establish proper oral hygiene which you should also do every night before bed.
Do rinse your aligners every time you take them off
Taking off your Invisalign can cause plaque and dried saliva to accumulate, which is why it is crucial to rinse every time you take them off. Doing this can get rid of the unnecessary particle build-up and make the aligners cleaner.
Do soak using the Invisalign cleaning system
Brushing and rinsing your clear aligners are helpful, but most experts recommend soaking with Invisalign cleaning system and crystals. It can help cleanse away germs and bacteria that other cleaning solutions cannot remove with simple brushing and rinsing.
Do floss your teeth before wearing the trays back in.
Ensuring that your teeth are clean before wearing your clear aligners will prevent particles from being trapped between your teeth and discourage the formation of plaque.
But…
Don’t leave your clear aligners out in the open
Exposing the trays to open-air will harbor bacteria and germs. It is essential to keep an aligner case for storage to avoid damages. For instances when you forget to bring a case, be sure to cleanse and rinse the trays before putting it back in your mouth.
Don’t forget to make a plan whenever you have long trips
Invisalign system requires you to switch between new aligners depending on your orthodontic treatment regimen. Mostly, however, requires weeks for a replacement procedure to rake place. If you have plans to travel, be sure to coordinate with your dentist to plan to switch your clear aligners throughout your trip.
Don’t eat or drink with Invisalign
Eating food and drinking colored beverages are a huge no when it comes to Invisalign. Don’t forget to take out your aligners to prevent damaging your trays.
Don’t use colored soap or toothpaste when cleaning your trays
Using colored cleaning materials for your trays will cause discoloration or damages. Consider Invisalign cleaning system when cleaning your aligners. These are specialized crystals that can clean and remove residues without affecting your trays’ appearance and taste.
References:
Frisbee, Evan. (November 2020). Invisible Aligners for Teeth.
It is essential to know how to clean mouth guard. A sports mouth guard is the perfect nesting place for bacteria. Making sure that the mouth guard is clean will keep disease and sickness at bay and keep you free to play the sport you love. This article will talk about how to properly clean your mouth guard and what not to do when rinsing your mouth guard. After reading the article, check out this post to get more information about mouth guard care.
Cleaning your mouth guard at home
There are many simple ways by which you can clean your mouth guard at home.
Use a toothbrush
Use a soft-bristled toothbrush to clean the mouth guard. Use warm water to remove the dirt and grime that has accumulated on the mouth guard. Make sure to do this after every use of the mouth guard.
Antibacterial soap
Use an antibacterial soap and water to clean the mouth guard. The soap should contain no alcohol so as not to damage the mouth guard.
Hydrogen Peroxide
Hydrogen peroxide is also an effective cleaning agent that can be used to clean a mouth guard. You can soak your mouth guard in a 3% hydrogen peroxide solution for around five to a maximum of ten minutes.
Store-bought mouth guard cleaners
There are special cleaners that are made specifically to do the task of cleaning your mouth guard. You can find these cleaning agents at your local supermarket or pharmacy.
There are a few things you should not do when you clean your mouth guard. You have to be careful about the cleaning materials and methods you use on the mouth guard.
Do not soak it overnight
Do not soak the mouth guard for too long. Especially if you are soaking it in a cleaning solution. The maximum time the mouth guard should be soaked is only for around 10 minutes. Do not use hot or boiling water as the mouth guard may lose its shape if you soak it for too long in hot water.
Please do not put it in the dishwasher
Mouth guards are not dishwasher safe and should not be placed in it. The strength of the dishwasher and the chemicals that are used in a dishwasher.
Do not use hand sanitizer, alcohol or dishwashing soap
These are cleaning agents that can damage and destroy the mouth guard. They should never be used when cleaning it. If you do not have the time to look for the special mouth guard cleaning agent, it is best to use an antibacterial soap and water.
Final thoughts
While you need to make sure your mouth guard is clean, you also have to be careful with how you clean it as well as what you use to clean it with. When in doubt, you can always approach your local pharmacist or your dentist for the best advice on how to clean mouth guard.


 An Invisalign® cleaning system consists of a set of specially-developed crystals that help you maintain your clear aligners’ quality. Its formulation offers a thorough and deep cleansing that works in between crevices to kill any bacteria present instantly. It also prevents the development of plaque and other unnecessary growth.
 Brushing and rinsing your clear aligners are helpful, but most experts recommend soaking with Invisalign cleaning system and crystals. It can help cleanse away germs and bacteria that other cleaning solutions cannot remove with simple brushing and rinsing.


